Moisture Meter: How to Check for Hidden Damp and Understand the Results

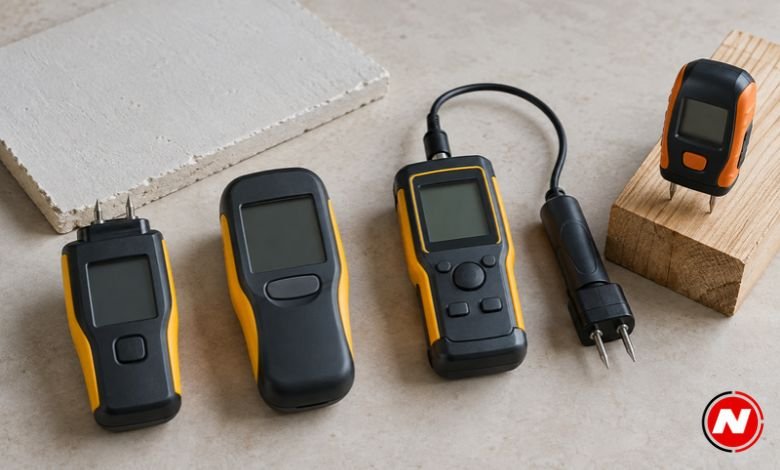
The wall looks dry. The paint feels firm. Yet a few weeks after you redecorate, a stain returns. Moisture can remain in a material long after its surface stops feeling wet. Timber has a similar problem: a board may look ready to fit but still hold enough water to move as it dries.
A moisture meter helps you check before that happens. Builders, woodworkers, and homeowners use these small tools to check damp areas, compare pieces of wood, and monitor drying after a leak. The reading can be valuable, but it needs context. The same number can mean different things on wood, plaster and concrete. Knowing how the meter works helps you decide what the result tells you and what it can’t.
How does a moisture meter work?
A moisture meter estimates moisture by measuring a material property that changes when water is present. Most handheld models use pins or a pinless sensor.
A pin meter has two metal probes that press into the material. It measures electrical resistance between them. In wood, that measurement helps the device estimate moisture content. Because the pins test a small area, they’re useful when you want to examine a particular spot. They also leave two small holes.
A pinless meter has a flat sensor pad. You place it against the surface and move it to other locations to compare readings. It can cover a wall or a stack of boards quickly without leaving marks. Its sensing depth depends on the model and setting, so check the instructions rather than assuming it measures everything behind the surface.
Neither type can identify the cause of damp on its own. Say a patch appears beneath a bathroom. A meter may show higher readings under one part of the floor. It cannot tell you whether the water came from a pipe, a shower seal or a spill. It helps you focus the investigation.
Meters can also help you monitor an area as it dries. If you record readings at the same points over several days, you can see whether they are changing. That is more useful than testing once and trying to remember the number later.
Pin versus pinless: which type should you use?
The best choice depends on the surface and how much detail you need.
A pin moisture meter is practical for rough timber, firewood, or a hidden part of a wooden frame, where small holes don’t matter. You can test a chosen point rather than scanning a broad area. If you need readings farther into a material, look for a meter and probe designed for that purpose; ordinary short pins have their own limits.
A pinless moisture meter suits finished wood and painted surfaces because it does not pierce them. Imagine checking a polished cabinet door before applying a finish. A pinless scan lets you test several places without leaving a row of marks. It is also a convenient first step when you want to map a suspicious area on a wall.
Some meters offer both modes. You can scan first, then check an unusual area more closely with pins if the surface can be marked and it is safe to insert them. Before using probes on a wall, consider whether cables, pipes or other services may lie behind it.
The type of meter matters, but so does its material setting. A device calibrated for wood does not automatically give a meaningful moisture percentage on plaster or brick. If you expect to work with several materials, check which modes the model supports and what each mode’s display means.
What do the readings actually mean?
A number on a screen can look more certain than it is. Start by checking whether the meter displays an estimated moisture percentage or a comparative reading.
On the right setting, a wood meter may estimate timber moisture content as a percentage. Still follow its instructions. Wood species and density can affect readings, and one part of a board may differ from another. Take measurements at several points instead of judging the whole piece from one spot.
On walls, a comparative scale often tells you which areas give higher readings. It does not necessarily show the true water percentage in the plaster. This makes a dry reference area helpful. Test a similar, unaffected part of the wall using the same setting, then compare it with the suspicious patch.
For example, begin well away from a stain and take readings as you move towards it. Continue past the stain and check above and below it. If the numbers rise near the mark and fall elsewhere, you have a useful picture of the affected area. Write down the locations so you can repeat the test later.
Treat an unexpected high result as a reason to investigate, not proof of a leak. Metal or wiring behind a wall can affect some pinless readings. Salts in building materials can influence resistance readings. Poor surface contact or the wrong setting can also make results harder to interpret.
Most of all, avoid using one “safe” number for every job. Wood, plasterboard and concrete behave differently. Even two meters may use different scales. Use the meter’s instructions and the requirements of the material you plan to fit or finish to guide your decision.
When is a moisture meter most useful?
Before painting a wall: A surface may feel dry while moisture remains within it. If the wall has had a leak or shows repeated staining, take readings across the area and compare them with an unaffected section. Find and address the water source before covering the wall with a new finish.
Before fitting wooden flooring: Check several boards, not just the one at the top of the pack. Timber gains and loses moisture as its surroundings change. Boards that are much wetter than the rest may shrink or change shape after fitting. A set of readings can help you spot a difference before the work is done.
After a leak: Mark the places where you test and record the date, meter setting and result. Recheck those same places as drying continues. Falling readings can show progress, but they do not prove the leak has been repaired. Look for any signs that water is still entering.
When investigating a damp patch: Use the meter to map the area, then inspect likely causes. These might include a window seal, a pipe, a gutter or condensation on a cold surface. Look at the pattern, not just the highest reading. A patch that returns after rain may call for a different investigation from one that appears during everyday use of a room.
Before covering a concrete floor: A handheld meter can help locate areas that need further checking. Do not rely on a quick surface scan alone to decide whether a slab is ready for flooring. Follow the flooring manufacturer’s instructions for the required moisture test and acceptable result.
In each case, the meter works best alongside a careful look at the building or material. Stains, peeling finishes, damaged seals and a musty smell can provide clues that a screen cannot.
Conclusion
A moisture meter can help you catch hidden damp before you paint, fit timber or cover a floor. It can also show whether an affected area is drying. Take several readings, use the correct setting and compare similar materials.
The result is a clue, not a diagnosis. Once you know where moisture may be present, the next step is to find out why it is there.
(FAQs)
Can a moisture meter find a hidden leak?
It can help locate areas with higher moisture readings and narrow down where to inspect. It cannot identify a broken pipe or confirm exactly how water entered.
Does a high reading mean there is mould?
No. A moisture meter checks for signs of moisture; it does not detect mould. If you see mould or smell a persistent musty odour, investigate the moisture source as well as the visible problem.
Are pinless meters better than pin meters?
Neither is better for every task. Pinless meters let you scan without marking the surface. Pin meters check a smaller area but leave holes. The right choice depends on the material and whether you need to protect its finish.
Can I use a wood moisture meter on a wall?
Use it only as the manufacturer instructs. A meter may have a wall mode with a comparative scale, but a percentage shown on its wood setting should not be assumed to be the wall’s actual moisture content.
How can I tell whether a damp area is drying?
Test the same marked spots over time with the same meter and setting. Record the readings and compare them with an unaffected area of the same material. A falling trend suggests progress, provided you’ve fixed the source of water.